Peacocks & Butterflies Day 2

I left you yesterday after stage one - paper mache-ing the bases of both masks.  The next day, I grabbed my trusty bag of CelluClay and mixed up a batch to start sculpting with (I've had this giant bag forever, it's amazing how many projects I've managed to do with it).  You have to build CelluClay up slowly so it dries properly - smacking too much of it on at once often doesn't work out so well. So here's a pic of the peacock mask after it's first layer of cellu-clay:

CelluClay layer #1. Nothing like a peacock yet. 

I know, I know, nothing like a peacock yet but have a little faith - it'll get there.  But first it has to dry (in case you haven't guessed yet, this will become a familiar refrain).  So, I turned my attention to the butterfly mask.

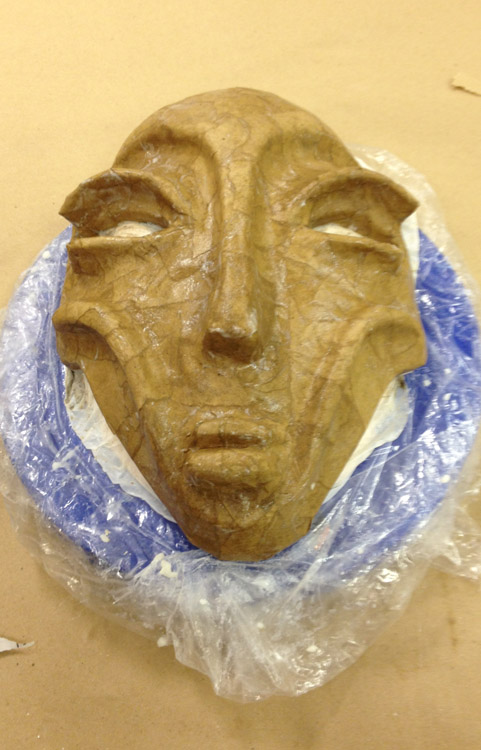
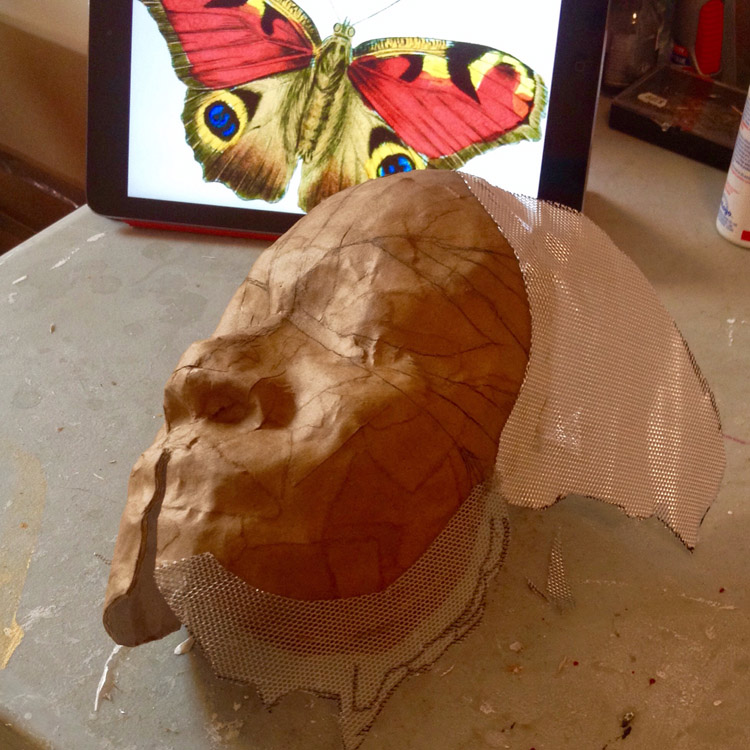
First thing I did after taking the paper off the plaster was wipe off the extra release agent - you don't want to leave a bunch of vaseline on the paper. Next I checked out a bunch of butterfly pics on google for inspiration.  Here's the one I landed on:

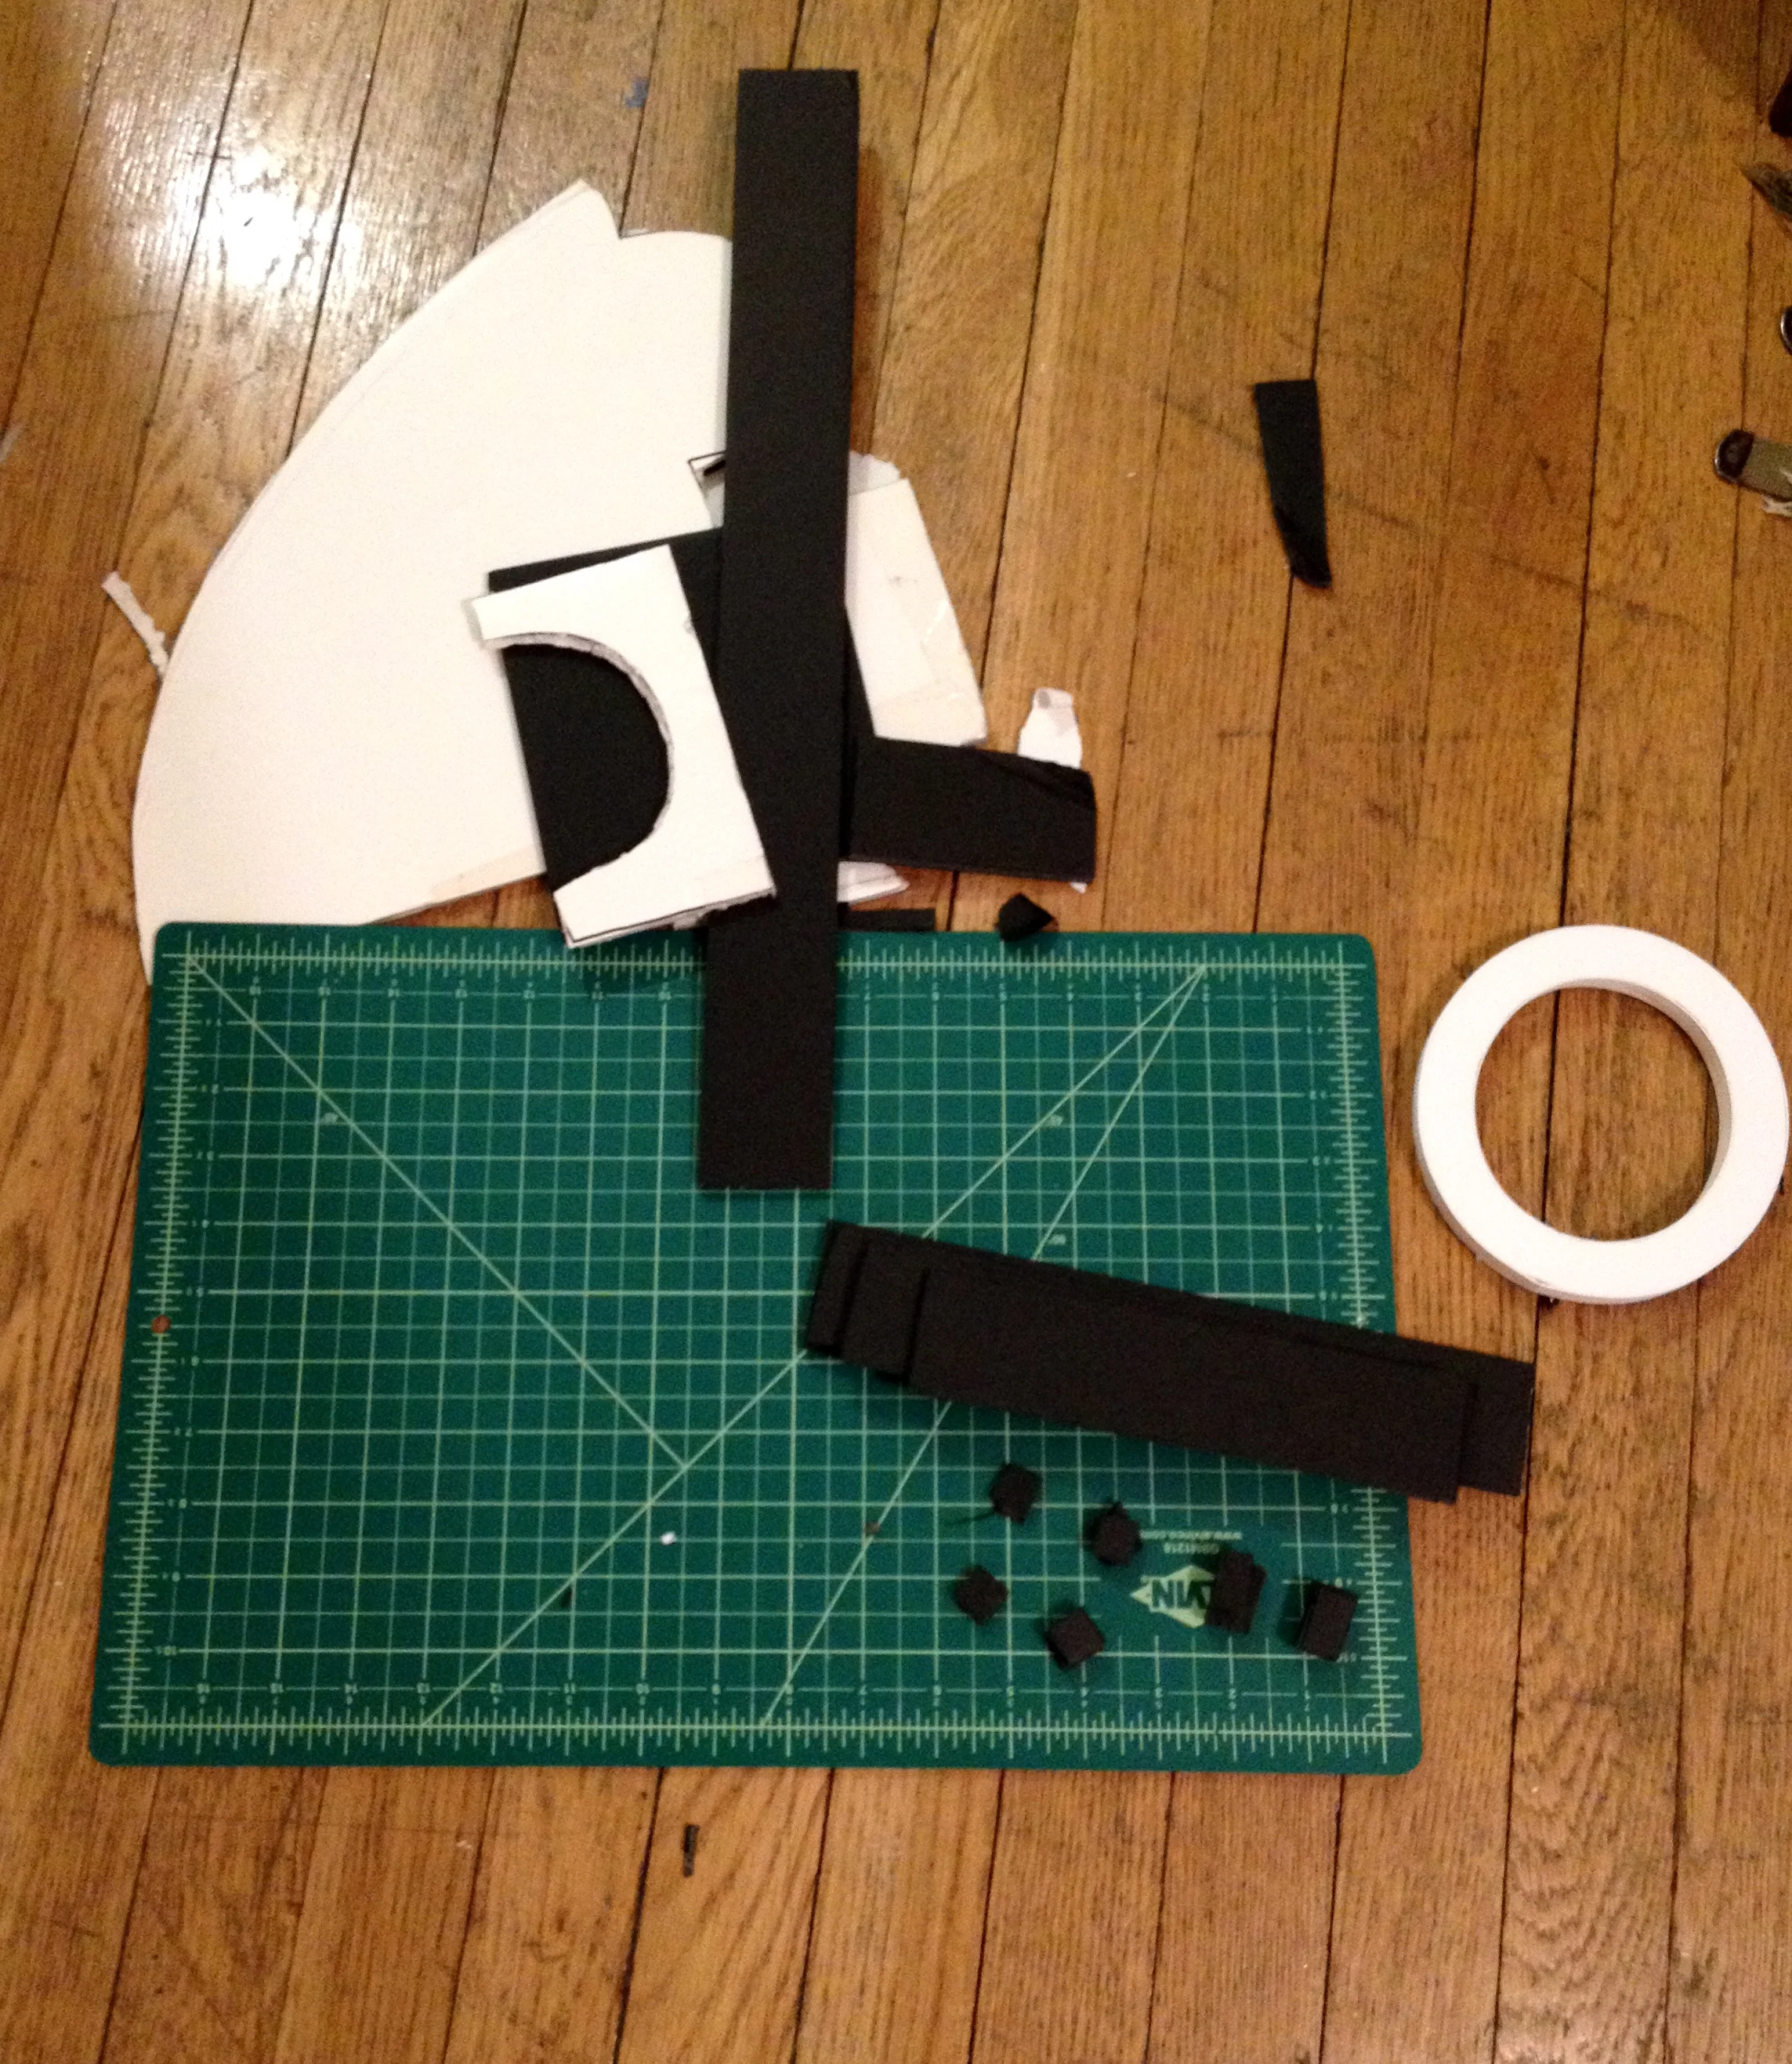
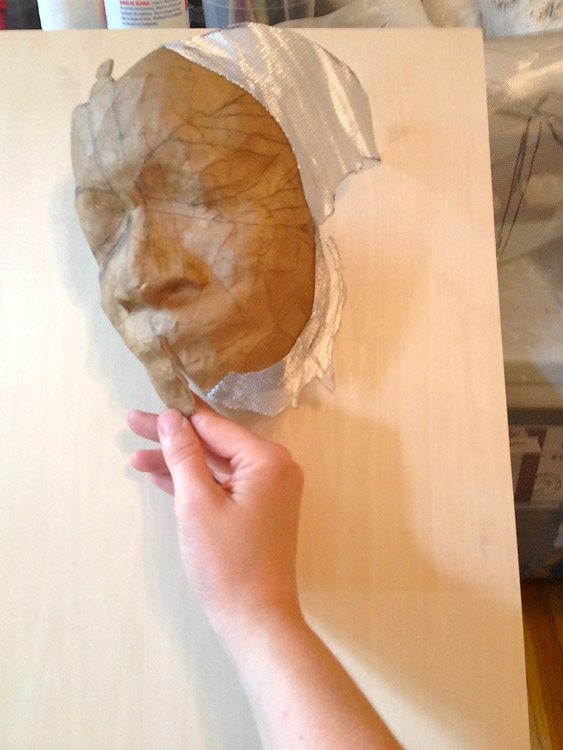
Now, how to get my face to look more like this butterfly.  I started by drawing some outlines on the face and then cut out a few sections to create some of the butterfly contour:

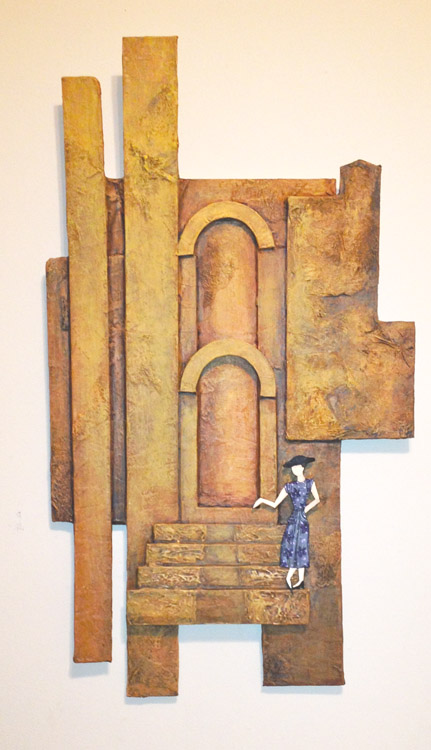
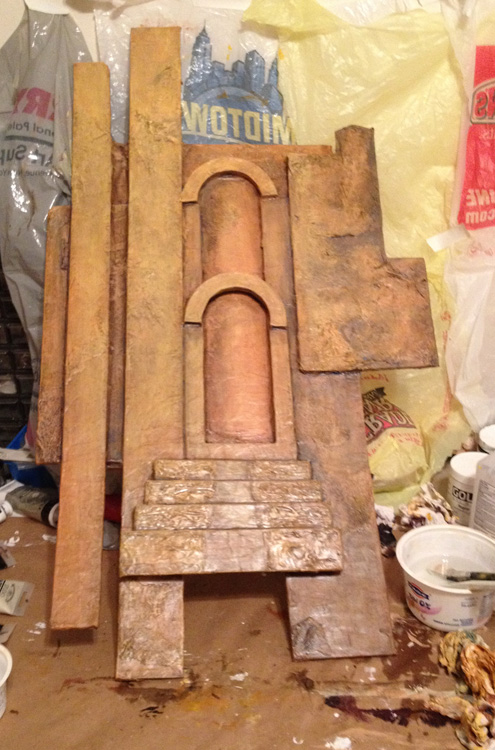
Next step was adding wings.  I decided to use metal mesh as I happened to have a roll lying around.  It's easy to cut and bend but will also make a strong armature. I draped the mesh over the form and drew out patterns for the wings, cut them out, and tacked them on with hot glue.  As this piece will be part of a larger composition I spent some time playing around with positioning on the wood panel I'm planning on using as a support.  Once I was sure I had the the shapes I wanted I started covering the new mesh wings with CelluClay.  Here are a few pics:

Guess what? That's right! More waiting for things to dry!  

I decided to google peacock face images to while away some of the time.  I found some great ones and later that evening decided my peacock mask was dry enough to put on another layer of CelluClay.  It became apparent that the beak needed some infrastructure to facilitate building it up faster and to keep it from getting too heavy. So, I used one of the metal mesh scraps to form an armature for the upper portion of the beak.  Once that was attached it was time for more CelluClay.  After the top was formed I used another small piece of mesh to form the bottom of the beak as well.   Here's what I ended up with before I called it a night.  

The shape isn't quite right yet but this layer needed to dry before any more additions could safely be made.  Hurry up and wait until the next installment. 


Pianos, Peacocks and Butterflies - Dream #34

Hello!  As those who follow me know, my dream/vision for March through May was working on a new Sing for Hope Piano - a sculpted, mosaic piano which was on display in the DUMBO Archway June 5th through the 21st.  I took a little hiatus after that but I am back in the swing of things now.  Dream #34 is one of mine - a waking dream vision (several actually) of masks and pieces incorporating masks.  I'm obsessed with peacocks and butterflies at the moment.  So I've started two new pieces.  One is a peacock mask and the other is a swarm of butterflies made of human faces (bear with me).  

#1 PEACOCK

So the peacock mask idea has been plaguing me for awhile so I decided to experiment with it.  I had a bunch of these lying around:

Yes, I've seen "Sleep No More" a few times but not THAT many.  Friends give them to me.  I can't imagine why...

So I decided to modify one as an initial base. Waste not, want not.  I cut off the long protuding bit beneath the nose and shaped up the bottom so it had a nice curve to it.  Then I scuffed it up a bit with sandpaper and added a couple layers of strip paper-mache to give it a different surface texture.

Cut down, reshaped and paper-mached base mask.

The paper mache needed to dry so I couldn't do anything else that night on this.  However, since I had a bunch of paste and paper strips I figured I may as well start the butterfly project at the same time.  which brings us to...

#2 BUTTERFLY

Since I want this piece to have one main butterfly/face as the focal point I decided to make a butterfly face mask first.  I perused my collection of faces to see which one I wanted to use as a base:

Yes, I have a plaster face collection, thank goodness I have actor friends who are willing to let me cast them. 

I decided to use Calvin's face (middle of front row) so I added some vaseline as a releasing agent and started paper mache-ing like a fiend.  Six layers alternating between brown and white kraft paper. I have a stash of both and not about to run out anytime soon.  Fun fact, the white kraft paper is from the music video I art-directed back in 2012 for the awesome Australian electro-pop fairytale duo Geppetto. I still have a roll of white paper we used on the floor and walls - really glad I saved it.  Back on topic, here's a picture from midway through the third or 4th layer:

I did six layers and called it a night. The down side to paper mache is the dry times.  You can force dry in the oven if your piece is small enough but unless there is a super rush I think it's better to just let 'em dry for a day in the open air. I'll check back in with you tomorrow with the next stages. Sweet dreams!


Hello again & Beginning Dream #19

Hello dreamers! I know, I know, I went MIA while I was in California and then Florida.  I'm just now settling back in to NYC (what's with the constant snow?!?! Why isn't it spring yet?).  If you are interested in the trips, check out the entries in Inkblots & Chickenscratch over the next few days.

Before I left I'd actually started on a new dream - Dream #19.  This was one of my dreams (I think I'm starting a pattern here of making one of mine and then one of yours). I had a small piece of superfine cotton and fabric paints that have been hanging around for a few years and I decided to make use of them.  I found an embroidery hoop, centered and stretched the fabric and started painting.  This is what I ended up with:

I've heat set the paint and am thinking about what's next.  I think I want to add beads - create a night sky edging from dark brown to inky black with opalescent stars and/or a halo of light. Maybe this will end up as a pillow or maybe I'll  hang like a tapestry.  Let me think on it.  I'll update when I make up my mind.  

Next post -  either re-doing the dress on the lady in Recycled Dream #2  or conceptual drawings for a one or more of the other dreams...check back in to find out :)

California Dreaming

Hi everyone, sorry I was MIA for two days. I was prepping for and then traveling to LA! I'm going to be on the left coast all week (not in the studio) so this week's blog posts will mostly consist of dream catching and maybe a few concept sketches. I've been up for about 22 hours now so I must go fall on my face. Before  I drift/fall/plummet into the land of Nod & since the American West has been a source of a number of dreams, tonight I leave you with a bird's (or plane's) eye view of it. Happy dreaming! 


Over Colorado

Over Colorado

Somewhere in southern Utah

Somewhere in southern Utah

image.jpg
image.jpg
image.jpg
image.jpg
image.jpg
image.jpg

Dream #2, Day 6 - Paper dolls and fashion plates

So from the get go I had this notion of this ancient, eternal city with it's mysterious buildings and passageways and then this singular figure/fashion-plate/cutout breezing through.  The juxtaposition of this timeless structure and the breeziness and temporality of the figure in her bright and breezy dress and hat passing through it or perched precariously on it.  

Since the majority of the description of the dream was about the outfit, I feel like that has to be the most detailed thing in the piece.  So step one to getting this figure right was to research 1940's style dresses, hats and belts.  Sir Google to the rescue!  Click HERE to see some of what I was looking at.

I was most interested in the images of 1940s dress pattern packages and the fashion plate sketches/drawings on them.  I also looked at a bunch of black and white photographs from the era and silhouette images.  I found a few I liked and drew a few to different scales (my printer decided to die on me not to long ago so no printouts for me :P - forcing me to improve my drawing skills so I guess it's ok).  I cut out the drawings and started playing around with taping them to the base in different positions to see what appealed to me the most.  Take a look:

I'm partial to the one I drew with the outstretched hand.  I have this notion she's looking at a watch. That she's on her way to something, or waiting for someone and bringing up the idea of time - how fleeting her time is here in this city that's thousands of years old.  Also that we are looking at someone in a n ancient city in clothes from the not-so-distant-past that already seems like ancient history in some ways given how much has changed in the past 70+ years.  The tall columnar figure fit quite well in front of the column but I actually think I'm leaning towards a feeling of displacement.  I don't want the figure to fit in.  I think it should stand out and have some distance - a flat, detailed-yet-2-dimentional figure fleetingly passing in front of this solid mass. On it but not of it.  

Back to practicalities.  I drew a couple  versions of the figure on some of that scrap poster-board from my collection and cut them out.

Then I gessoed the figures and left them to dry while I got lunch.  Didn't take pics.  I really will get better at this documenting thing...maybe.   After lunch I played around with paint trying to figure out the dress and all that jazz.  Lots of cross referencing with images from google. There was a lot of penciling in dress styles and painting over things before I arrived at this:

Now I know the dress is too muted and will have to be punched up but I want to get her on the base first so I can tell how far it has to go.  So I played around again for awhile (I'd made this cutout a little bigger than my original paper doll so the original pose positions weren't quite right). I finally decided on placing her right on the edge of the bottom step. FYI she's tacked on with hot glue.  Also, the light is crap in my living room/studio at night so sorry about the variable picture quality. 

She looks a little Vanna White-ish.  I need to stare at it on my wall for a while to decide about how to punch up the dress  and if I want to try moving her.  Things to think about.  I'll get back to you in the next few days. 

Recycling Dream#2 - Day 5

So yesterday I ended with a hot mess and now it's time to fix it.  How you say?  With more paint...lots more paint...layers and layers of paint.  Time to bust out the yogurt cups I keep stashing - they are awesome vessels for mixing paint in - I'm particularly fond of the Fage and Chobani individual cups. Time for a bunch of yellows, ochres, siennas and browns, and the acrylic glazing liquid. Oh yeah, and paper towels, a lot of paper towels ( I will recycle them into something else I promise). I did a base layer over the whole piece which I tragically forgot to photograph (sorry).  Then I started on glazes.  Since a picture is worth a thousand words, here's a mini gallery of pics taken after a few of the new layers of paint. I didn't always remember to take pics. It's difficult to remember to stop and document when you are on a roll!  I think I should maybe figure out time-lapse video...

So I originally thought I'd want to capture the slightly washed out and muted feeling of the stone from my reference images but there was something about the vibrancy of the mustardy ochers and dirty browns and siennas that I really liked so I decided to leave it as is.  I used some blues and purples to emphasize some of the shadows and called it a day.  

Next up - getting the woman in the 40's style dress into the picture!

Recycling Dream #2 - Day 4

So I'm excited because - finally! I get to paint with colors! After staring at reference images of Jerusalem - old city - with all of it's muted stone and some buttery late afternoon light shots - I went completely nuts with the base colors for this thing  to begin with.  The complete opposite of muted. I was in a real purpley-red and yellow kinda mood so this happened:

And then I thought - I need texture, serious texture.  What can I add to this? And low and behold, I had a metric ton of paint covered paper towels from all the blotting and wiping I'd done and they seemed perfect.

So I started tearing them up and attaching pieces to the base using matte gel medium.

I thought the steps needed texture too but a different type.  So I rummaged around in my collection of gels and mediums and decided to try out some molding paste.  I futzed around with a palette knife and a brush for awhile.  Never quite managed the effect I was going for but at certain point I just decided it was close enough. After all of that the piece looks like this:

HOT MESS RIGHT?!?!?!

Definitely one of those "What the F&$% have I done?  How the heck do I save this mess?" kinda moments. More and different paint is most likely the answer to this question. However, I decided now was a good time to go do something else - like sleep - so the thing could dry and my subconscious could have some time to come up with a solution.  Back tomorrow with more. 

Recycling Dream #2 - Days 2 & 3

Hi again! Today we're back to the making of Dream #2.  Day two was a paper-mache day. I covered the whole piece in three layers of strip paper-mache - alternating white and brown kraft paper.  I used a traditional boiled water and flour paste with a few drops of clove oil (to help prevent mold) and mixed the paste with Elmers glue for added strength.  Once I covered the whole thing I left it to dry overnight. Now, 'cause my hands were all gluey - and because I get really one-track-minded when I'm pasting - I didn't take any pics of that part of the process.  Sorry!  Best I can give you is the pic below from the Day 3 when I started gessoing:

This is when I remembered I'd forgotten to take pics the day before and quickly snapped one to show how the paper mache layer looks. 

So, as you can probably guess, I then spent a bit of time gesso-ing the whole piece.  That was pretty much it for day three 'cause that gesso had to dry thoroughly.  Tomorrow - paint!


Dream #11 - A confession, a time warp and a mask.

So a confession - a few of the dreams/visions in the dreamcatcher are mine and some of them I started working on a while ago.  Dream #11 is one of those and there's a bit of a backstory.  

So, last spring & summer I was taking African dance classes at Djoniba Dance (AWESOME CLASSES - if you are in NYC go take one).  My teacher, Djoniba Mouflet, hosts these African Dance and drumming parties at various clubs on Manhattan about once a month and he invited class participants to attend.  After class, several of us, including Djoniba, were hanging out, wiping off the sweat and chatting - as you do - and Djoniba mentioned that he'd like to have masks for these events.  So of course I was like "Hey, I make masks."  We got to talking and he said if I had time to make one he'd be happy to have one of his dancers wear it and promote it. He suggested taking a look at West African masks but that I should make whatever I felt like.  This sounded like fun.  Being a mask junkie, I've seen a lot of African masks before but figured some quality time with Google Images would not go amiss. So I went home that night and Googled my way to tons of West African mask images.  I loved a lot of the motifs but nothing was jumping into my brain.  I decided to let my subconscious work on it for a bit.  Nothing was really coming but I wanted to try and make something so, on one of my trips to Virginia I made a mask base out of clay and did a few layers of strip paper mache on top of it.   I made the initial clay base at TJ Art Studios in VA. I mention this because it's one of my favorite places to work.  If you are an Arlington County resident this place is a great resource - open studios and classes available for ceramics, jewelry, woodworking and traditional photography (with chemicals and enlargers oh my!). Here's a pic of the initial base:

Looks like an alien right?  I was totally not feeling it but I took it home to NYC with me and stuck it in my "maybe something will come to me" pile.  Of course, between my two jobs and other personal projects it got lost in the shuffle.  Until, one day on the subway (where most of my visions drop in) the Ragman came to visit:

Dream #11: I had a vision of an a African style mask called the Ragman.  The face was angry and austere with slashed cheeks and oval eyes. Ochre and earth tones mixed with stark red and white. The face is in the middle of a large cross within a 3/4 circle with multi-colored rags hanging from the the free arm of the cross - the section without the circle.  He's a rag and bone man.  Collecting pieces of the dead before they are dust and ashes. He's the color of their lives as they enter the ground. 

Finally! I could see it and it wanted to get made.  Little did I know that, with one thing and another,  this was going to be about a 5 month process (hey, life happens right?).

So the first thing was that the eyes on my mask base were ALL WRONG! Question was, do I start form scratch or could I make the existing base work?  I decided I could make the base work.  I cut off the protrudent eye ridges and attached pieces of half-circles of cut-out cardboard.  I layered on a bunch of plaster impregnated gauze to attach the eye pieces and fill out the cheeks.  This also increased the strength of the piece.  I kept attaching a mix of cardboard and gauze to change the shape until it match the vision. I was in a frenzy and did not take pics I'm sorry to say.  Wasn't thinking of documenting at the time.  

Next up was attaching the cross.  I got some long dowels and cut them to size with my trusty Dremel tool. I drilled some holes in the mask and attached the cross one dowel at a time using a mix of hot glue and several additional layers of plaster gauze to hold them securely in place.  I spent a lot of time acting as a vise that day.  Luckily for me, plaster gauze sets up very quickly. 

Next was figuring out how to add the 3/4 circle.  I ended up laying the mask on the floor with sheets of scrap foam core underneath and drawing out the arches.  I cut the 1/4 circle arches out of the foam core, centered them on the dowels and attached with glue and plaster gauze.  Now the foam-core was way too flimsy so I reinforced with a few layers of plaster gauze (see first pic below).  Next I decided I wanted to wrap the cross and circle in fabric.  This led to a long adventure in ripping up and bleaching an old pair of jeans into usable strips. I won't go into that.  Suffice to say I ended up with lots of bleached denim that I soaked in Paverpol (a glue made for creating sculpture with fabric) and wrapped tightly around the cross and circle.  It was a very messy job...

It took about two weeks for that to completely dry and off-gas.  I was out of town for a bit and when I came back my apartment was stinky! Note to all of you about proper ventilation - make sure you have it!

This post is getting way too long - realizing it's good to space these out - so I'm going to let the pictures do most of the talking.  Suffice to say over the next few months I attached hanging rags, added a few layers of gesso and lots of layers of paint.  Here's some of the progression in pictures:

Many long months of on-and-off-working later, we have our finished Ragman/Rag & Bone.  Photographs are by the  Al Foote III Theatrical Photography.  More pics are in my Wearable Masks portfolio. 

Dream realized! Adding him to the Dream Gallery. 

How would you recycle/re-imagine the Ragman?  Is there a story in here somewhere? Another mask?  Painting/drawing/character sketch?  If the ragman inspires you - send me your vision for him. Each creation is a building block for the next. Hope to hear from you soon. Thanks for reading!


First one! - Recycling Dream #2 - Day 1

Alrighty! Excited to get started recycling some dreams! So I decided to start with Dream #2 because I instantly had an idea for it.  Here's the dream so you don't have to go flipping between pages:

"I am walking down the street in Israel wearing a 40’s style dress in a vivid large floral print in two shades of purple, very big flowers, there is a narrow paten black belt with a small bow in the center. I am wearing a small brimmed black straw, dressy, hat."

Right off the bat I just had this vision of mysterious, twisty old streets in bleached sand colors with this vivid almost cartoon/paper-doll/fashion-drawing-cut-out of a woman in this vibrant dress.  So how to make this?  First I googled "Jerusalem street images" and picked some of my favorites as reference images.  I was really struck by the pictures of the old city with it's stone stairs and archways. I also fell in love with the Dome of the Rock.  I think I might try and incorporate a piece of it glinting in the distance somehow. We'll see. 

I decided I wanted the piece to be at least partially dimensional.  With this in mind, I decided to build a "canvas"/base that would suggest the streets and buildings and narrow walkways - glimpses into a different world.  I have a bag full of scrap pieces of poster board and foam core waiting to be used up (rescued from the trash pile of a design firm) so I dragged that out first and started playing with different combinations of sizes and shapes.  There was much haphazard measuring and cutting and swearing (because I am not so good at cutting in straight lines and my exacto knife blade was kinda dull).  Here's a pic of some of the carnage:

Yes I was cutting stuff out on my floor.  Nowhere near enough table space in my living room/studio. Someday I'll have a dedicated studio space with LOTS OF TABLES....Someday...

Yes I was cutting stuff out on my floor.  Nowhere near enough table space in my living room/studio. Someday I'll have a dedicated studio space with LOTS OF TABLES....Someday...

Once I had all my pieces, out came the trusty glue gun for tacking them together. I took a pic when I was 3/4 of the way through the gluing process. 

Yes, my space is kinda messy - lots of stuff in a small space and i like to be able to see all my materials so I can grab at will. 

Yes, my space is kinda messy - lots of stuff in a small space and i like to be able to see all my materials so I can grab at will. 

Here's the base "canvas"  all tacked together:

Sorry for the crappy picture quality - it's from my iphone in low-light conditions.

Sorry for the crappy picture quality - it's from my iphone in low-light conditions.

This is where I stopped for the evening. Next up - Gesso and maybe some paper mache! Stay tuned :)